> ## Documentation Index
> Fetch the complete documentation index at: https://stackone-hub-docs-confluence-api-token-update.mintlify.site/llms.txt
> Use this file to discover all available pages before exploring further.
# Checkmk
> Follow these steps to connect Checkmk with StackOne Hub successfully.
Ensure you have Administrator privileges for your Checkmk Dashboard.
If you've been directed to StackOne to integrate with Checkmk, the following steps will help you understand the process and any necessary actions to configure successful integration.
## Get Your Checkmk Site URL
Log in to your Checkmk Dashboard. Your Site URL will consist of the host name with site name and protocall as : `{{Protocall}}://{{Host name}}/{{Site name}}`
For example: `https://myhost/mysite/check_mk/index.py?start_url=%2Fmysite%2Fcheck_mk%2Fdashboard.py`
The Site URL is [https://myhost/mysite](https://myhost/mysite).
## Get user credentials
You will need to provide a Username, Password and Site URL. It is recommended that you set up a new account for integration purposes.
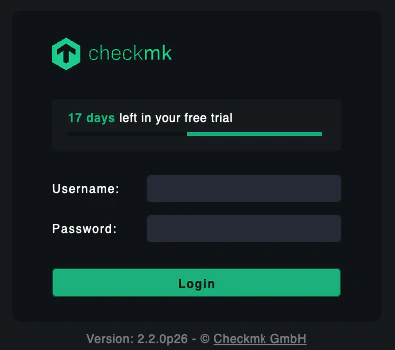
Log in to your Checkmk Dashboard.
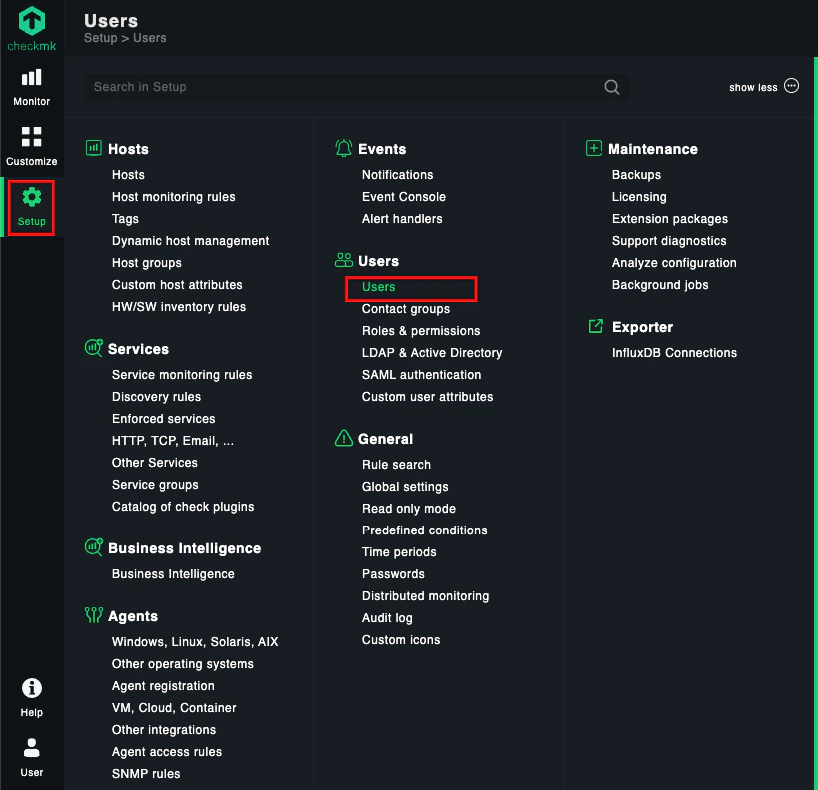
 Click on the `Setup` button from the left menu and then click on the `Users` under Users tab.
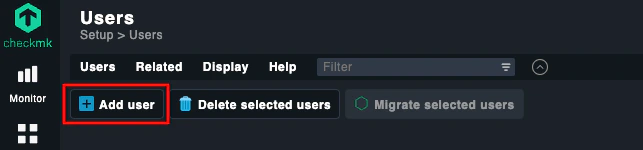
 Click the `➕ Add user` to create a new User.
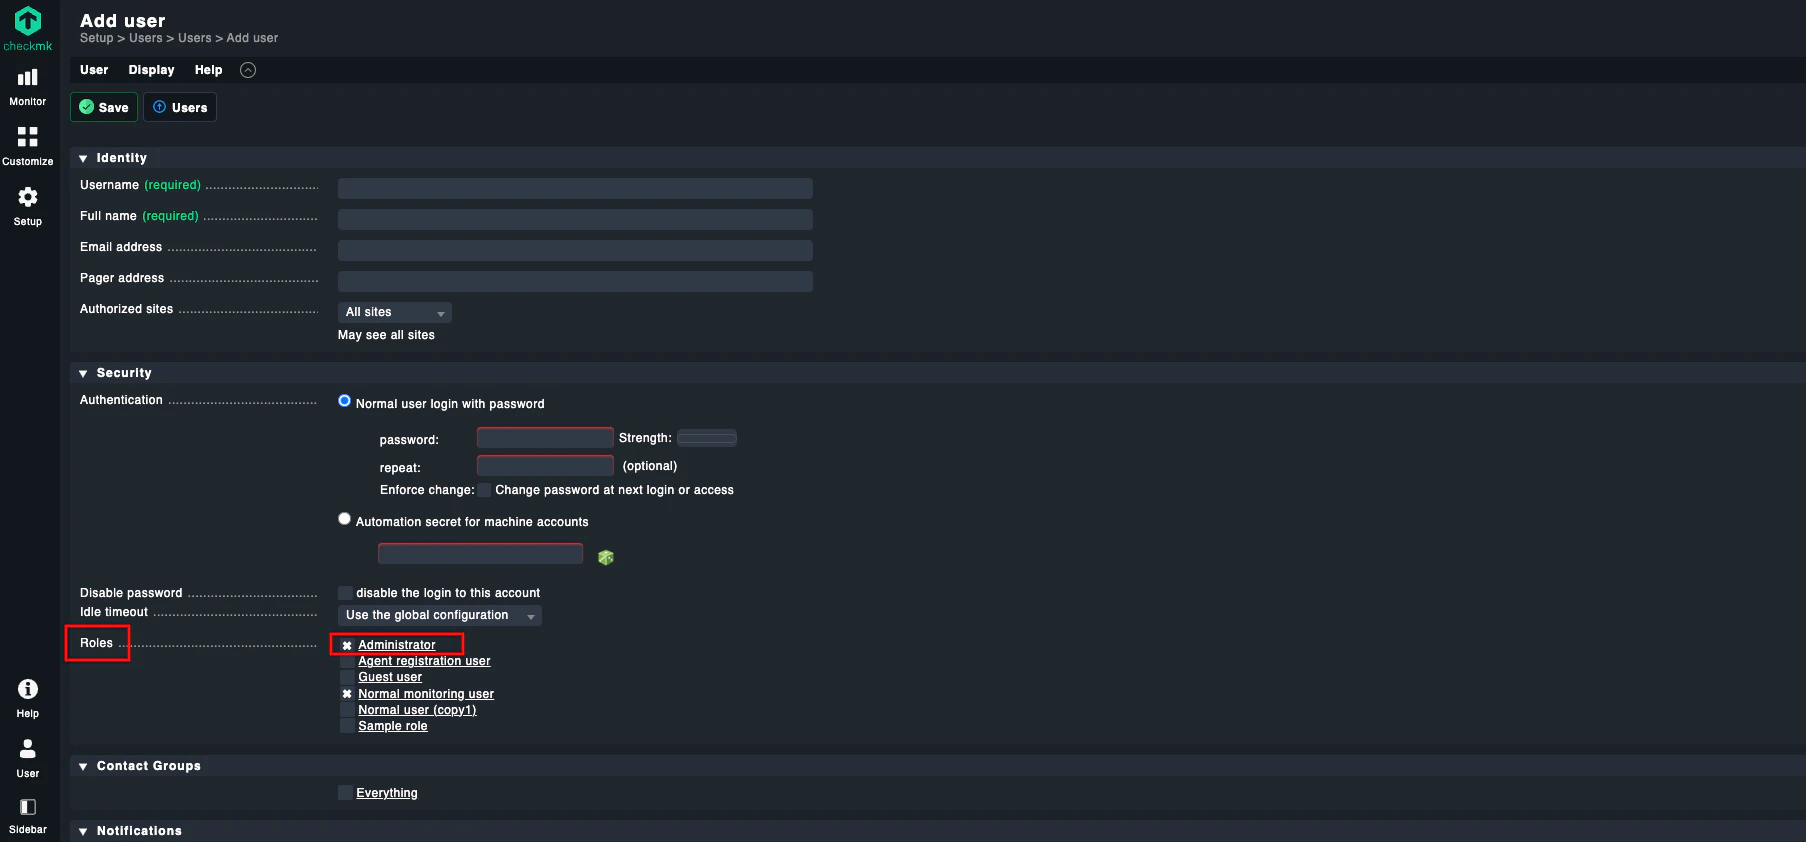
 Fill out the required fields including username and password and add the Role `Administrator`. This will ensure the account has the correct permissions, and then click `Save` button at top left corner.
 ## Connecting to StackOne
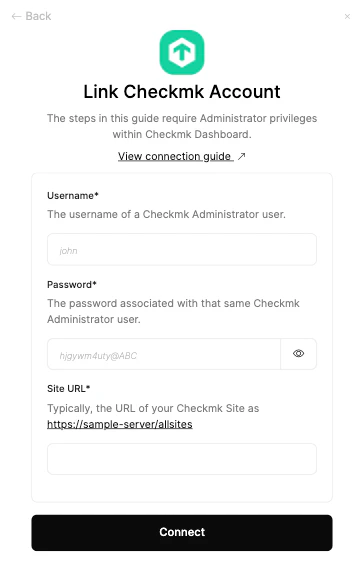
Upon reaching the Link Account page, enter the Username, Password and Site URL from the previous step. Proceed by clicking the Connect button.
## Connecting to StackOne
Upon reaching the Link Account page, enter the Username, Password and Site URL from the previous step. Proceed by clicking the Connect button.
Congratulations, you're all set! If you face any issues with the steps mentioned above,
please contact us by emailing [integrations@stackone.com](mailto:integrations@stackone.com). We're always here to assist you!
## Available data
This integration has the following [IAM Resources](https://docs.stackone.com/reference/iam_list_users) available from the provider:
## Useful Links
[https://docs.checkmk.com/latest/en/rest\_api.html](https://docs.checkmk.com/latest/en/rest_api.html)
[https://docs.checkmk.com/latest/en/wato\_user.html](https://docs.checkmk.com/latest/en/wato_user.html)