> ## Documentation Index
> Fetch the complete documentation index at: https://stackone-hub-docs-confluence-api-token-update.mintlify.site/llms.txt
> Use this file to discover all available pages before exploring further.
# 1Password
> Follow these steps to connect 1Password via the StackOne Hub successfully.
Ensure you have Administrator privileges within your 1Password account.
If you've been directed to StackOne to integrate with 1Password, the following steps will help you understand the process and any necessary actions to configure successful integration.
## Introduction
1Password requires account holders to deploy an independent SCIM Bridge to support User data and provisioning via API.
Learn more about the setup requirements and deployment process in [1Password Support](https://support.1password.com/scim/). An Identity Provider (IDP) is not required to configure this integration, but note that the SCIM Bridge setup may vary for connection with different IDPs.
Your SCIM Bridge must be fully configured for this integration. You can check the status of your SCIM bridge at `your-scim-bridge-url/app/status`.
**Google Workspace** limitation: 1Password currently does not support IAM API endpoints for SCIM Bridges connected to Google Workspace for User Provisioning.
As a workaround, a second 1Password SCIM Bridge can be deployed to service this IAM connection.
This second SCIM Bridge must use the same *scimsession* file, and must not be connected to Google Workspace.
## Enable 1Password User Provisioning
Log in to your [1Password account](https://my.1password.com/signin) with your Administrator credentials.
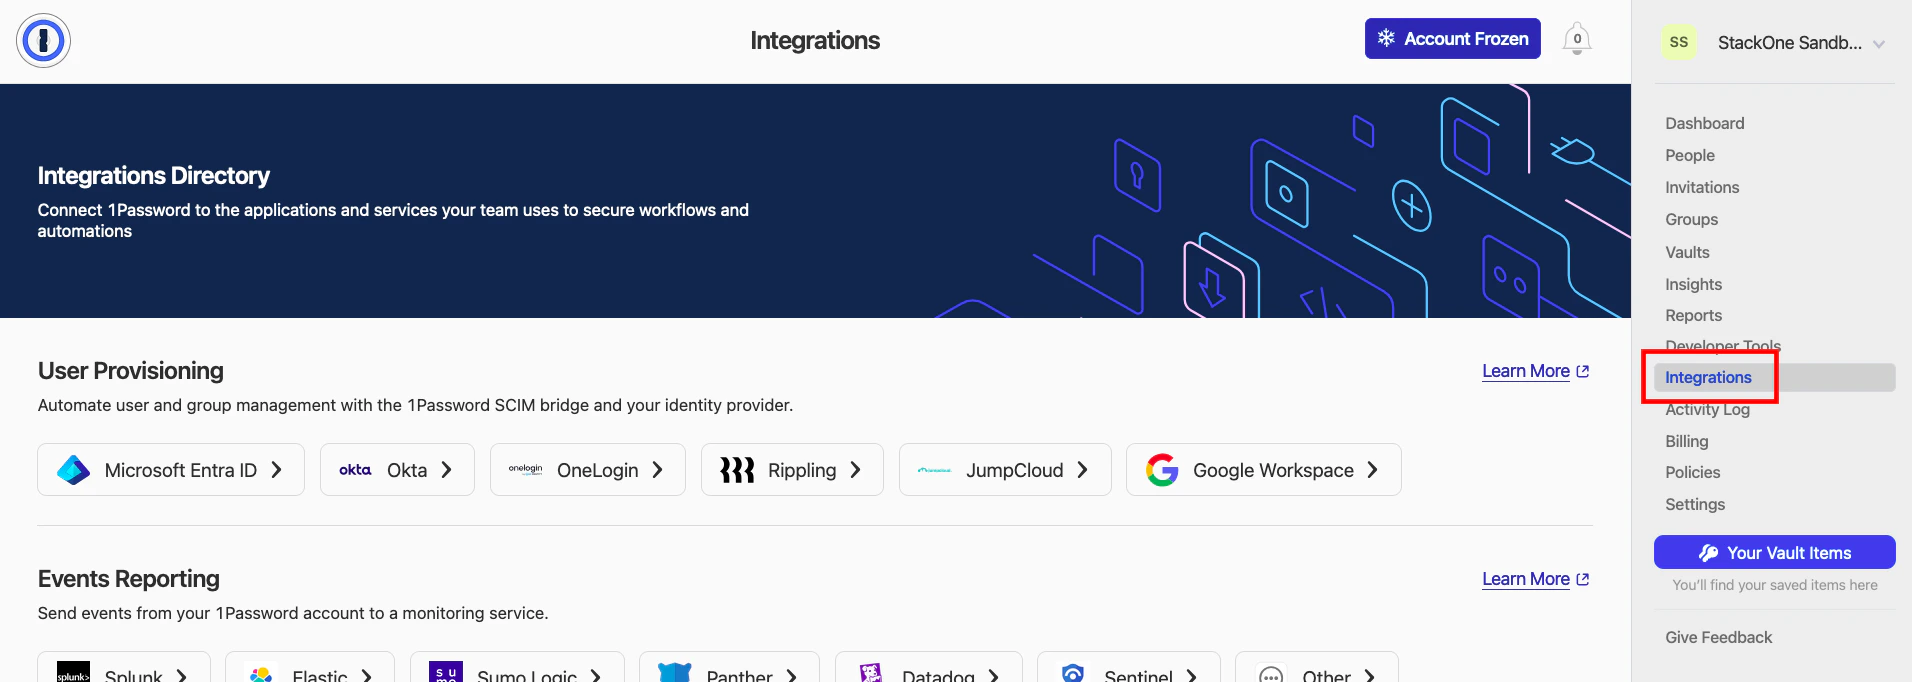
Navigate to Integrations, and select your listed Identity Provider to proceed. If you do not wish to connect to an IDP, select Okta to be used as the default.
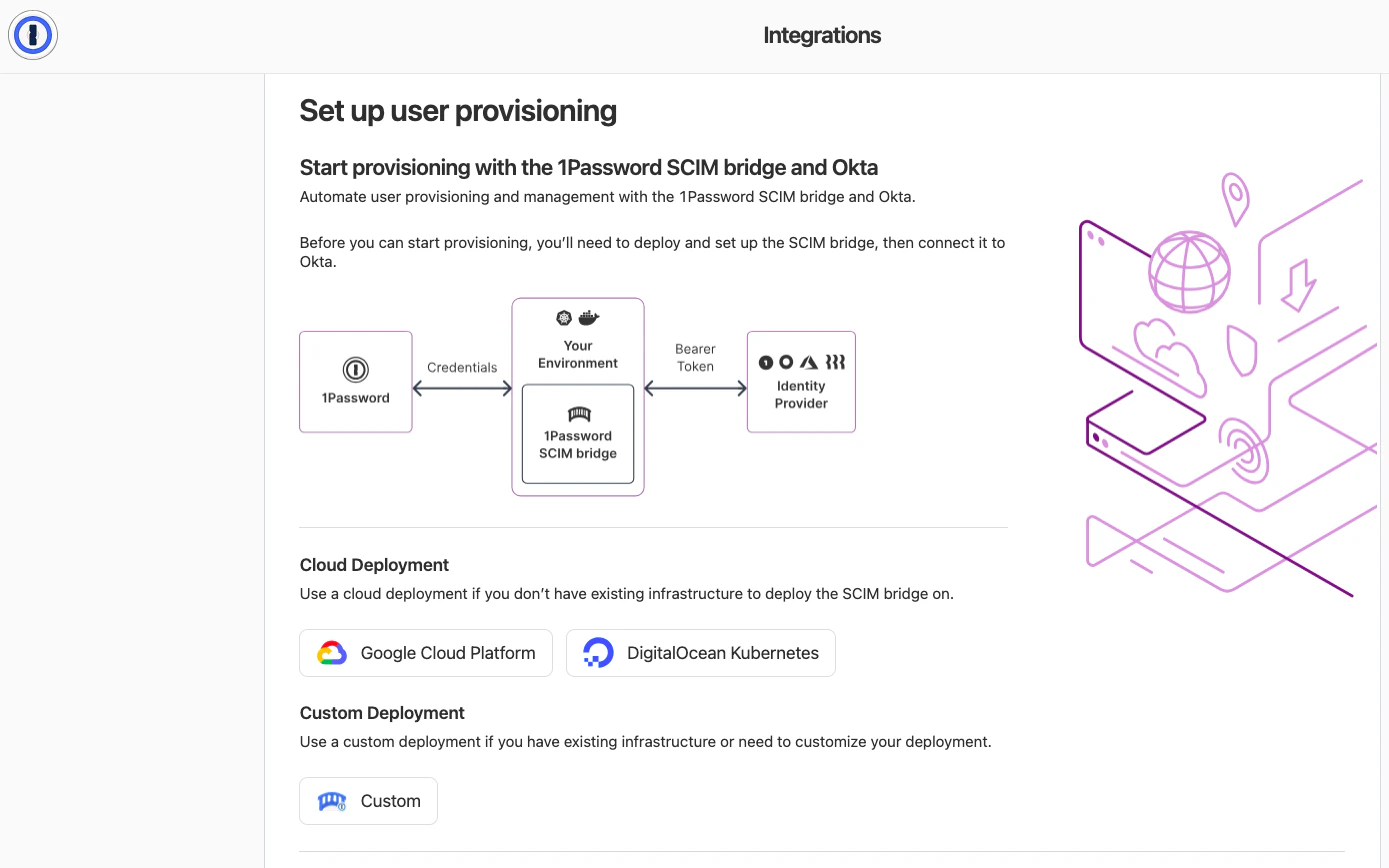
 Based on how your SCIM Bridge will be deployed, select the listed deployment method, then click the Next button.
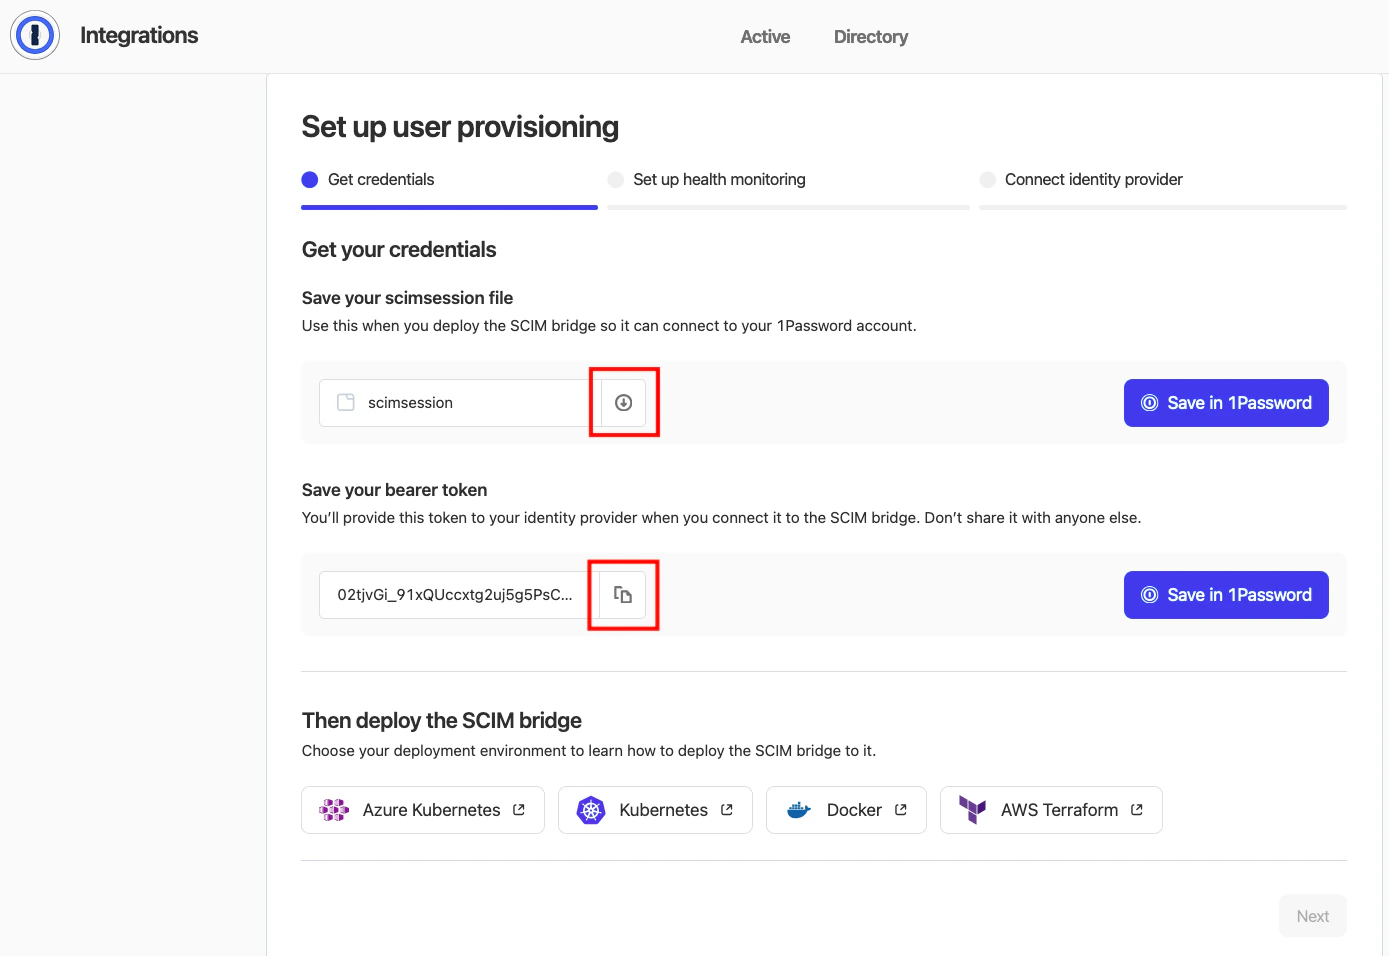
 Download and save your **scimsession** file securely, which will be used when deploying your SCIM Bridge to connect with 1Password.
Download and store your **bearer token** securely, which both an IDP and this integration will use to connect to the SCIM Bridge.
Download and save your **scimsession** file securely, which will be used when deploying your SCIM Bridge to connect with 1Password.
Download and store your **bearer token** securely, which both an IDP and this integration will use to connect to the SCIM Bridge.
 If needed, click the button for your deployment type and follow the instructions to deploy.
Press the Next button to proceed.
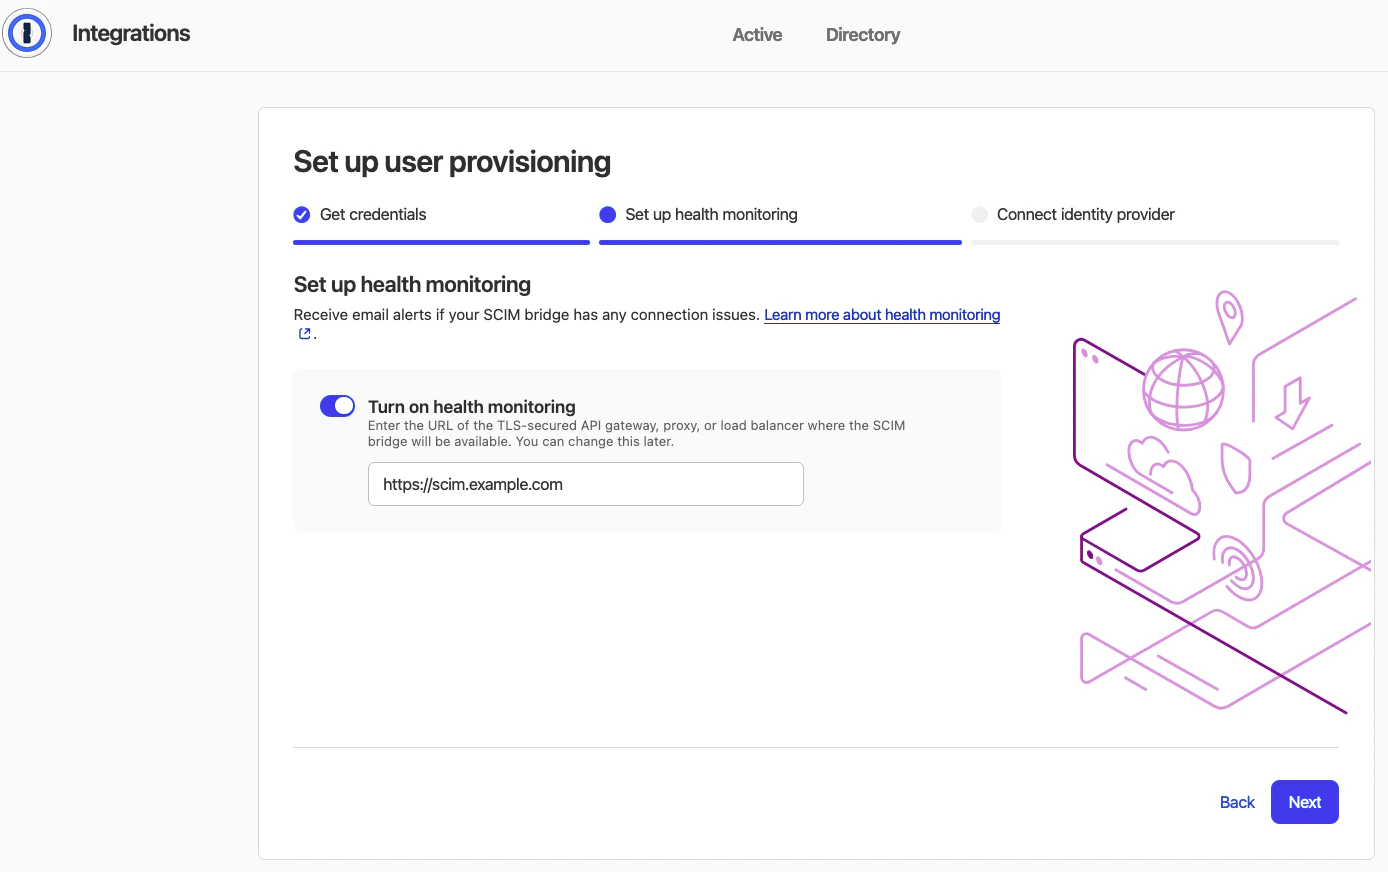
1Password offers an optional alert system to notify you connection issues with your SCIM Bridge.
To set up, enable "Turn on health monitoring" and enter the publicly-addressable URL for your SCIM Bridge deployment.
Click the Next button to proceed.
If needed, click the button for your deployment type and follow the instructions to deploy.
Press the Next button to proceed.
1Password offers an optional alert system to notify you connection issues with your SCIM Bridge.
To set up, enable "Turn on health monitoring" and enter the publicly-addressable URL for your SCIM Bridge deployment.
Click the Next button to proceed.
 If you wish to connect an IDP to your SCIM Bridge, click the tile for your IDP to view configuration instructions.
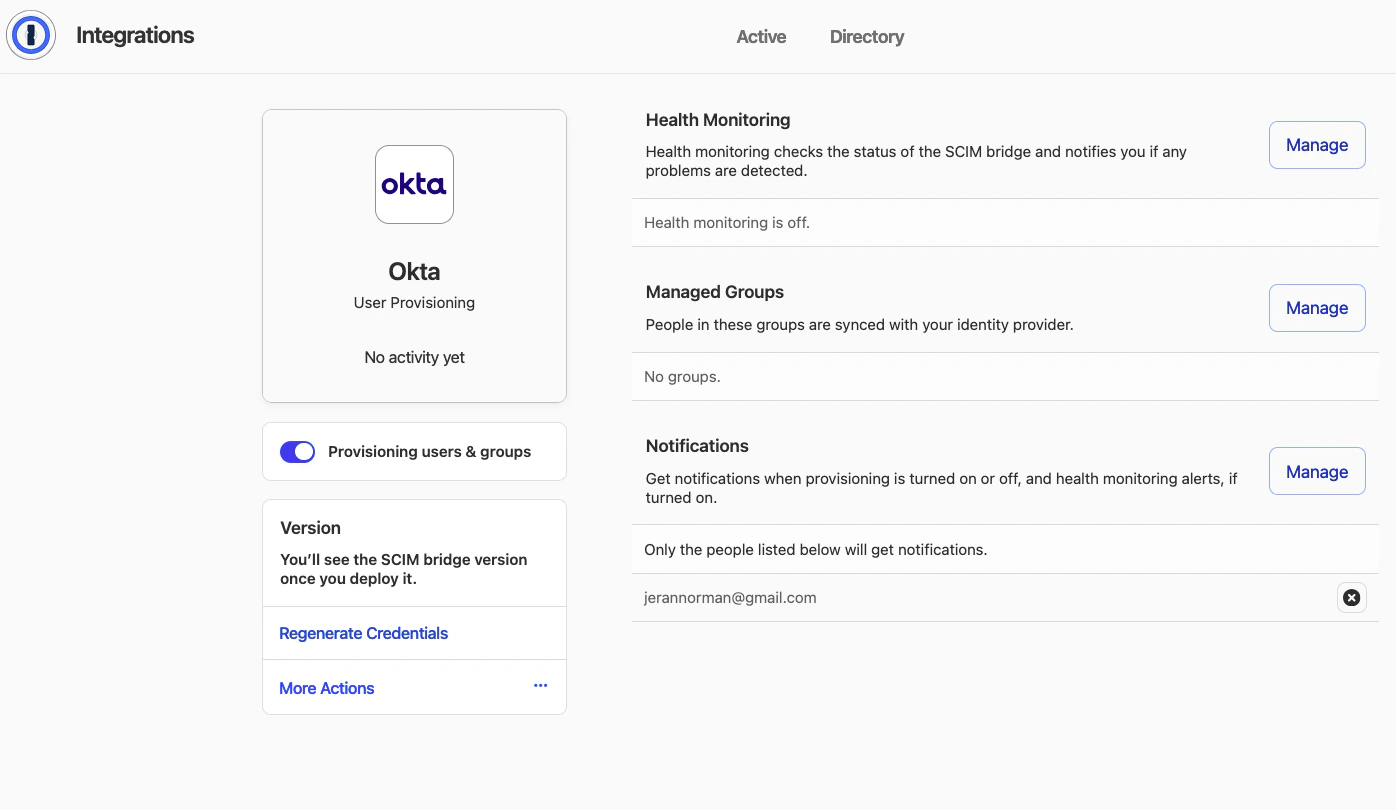
Click the "View details" button to open the new User Provisioning configuration profile.
On this page in 1Password, you can adjust multiple User Provisioning settings, generate new credentials, or delete the setup.
If you wish to connect an IDP to your SCIM Bridge, click the tile for your IDP to view configuration instructions.
Click the "View details" button to open the new User Provisioning configuration profile.
On this page in 1Password, you can adjust multiple User Provisioning settings, generate new credentials, or delete the setup.
 ## Deploy 1Password SCIM Bridge
See 1Password's official [SCIM Bridge deployment examples repo](https://github.com/1Password/scim-examples) for specific setup instructions across different deployment options.
This will require the **scimsession** file generated from enabling User Provision in your 1Password account.
Note the publicly-addressable URL (example: `https://op-scim.mydomain.org`) of this deployment, as it is required for establishing this connection.
## Connecting with StackOne
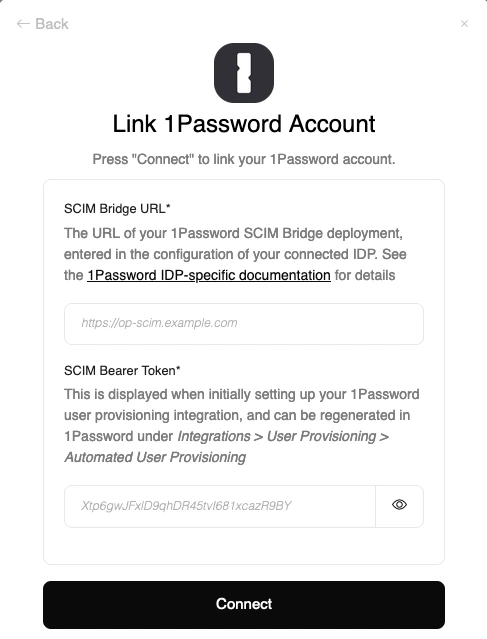
Upon reaching the Link Account page, enter your credentials from the previous steps:
## Deploy 1Password SCIM Bridge
See 1Password's official [SCIM Bridge deployment examples repo](https://github.com/1Password/scim-examples) for specific setup instructions across different deployment options.
This will require the **scimsession** file generated from enabling User Provision in your 1Password account.
Note the publicly-addressable URL (example: `https://op-scim.mydomain.org`) of this deployment, as it is required for establishing this connection.
## Connecting with StackOne
Upon reaching the Link Account page, enter your credentials from the previous steps:
- SCIM Bridge URL: the publicly-addressable URL of your SCIM Bridge deployment. If you have an IDP connected, this will be the same URL entered in the IDP's 1Password configuration.
- SCIM Bearer Token: the **bearer token** displayed when initially enabling User Provisioning in 1Password
Proceed by clicking the Connect button.
Congratulations, you're all set! If you face any issues with the steps mentioned above,
please contact us by emailing [integrations@stackone.com](mailto:integrations@stackone.com). We're always here to assist you!
## Available data
This integration has the following [IAM Resources](https://docs.stackone.com/reference/iam_list_users) available from the provider:
## Useful Links
[https://support.1password.com/scim/](https://support.1password.com/scim/)
[https://github.com/1Password/scim-examples](https://github.com/1Password/scim-examples)